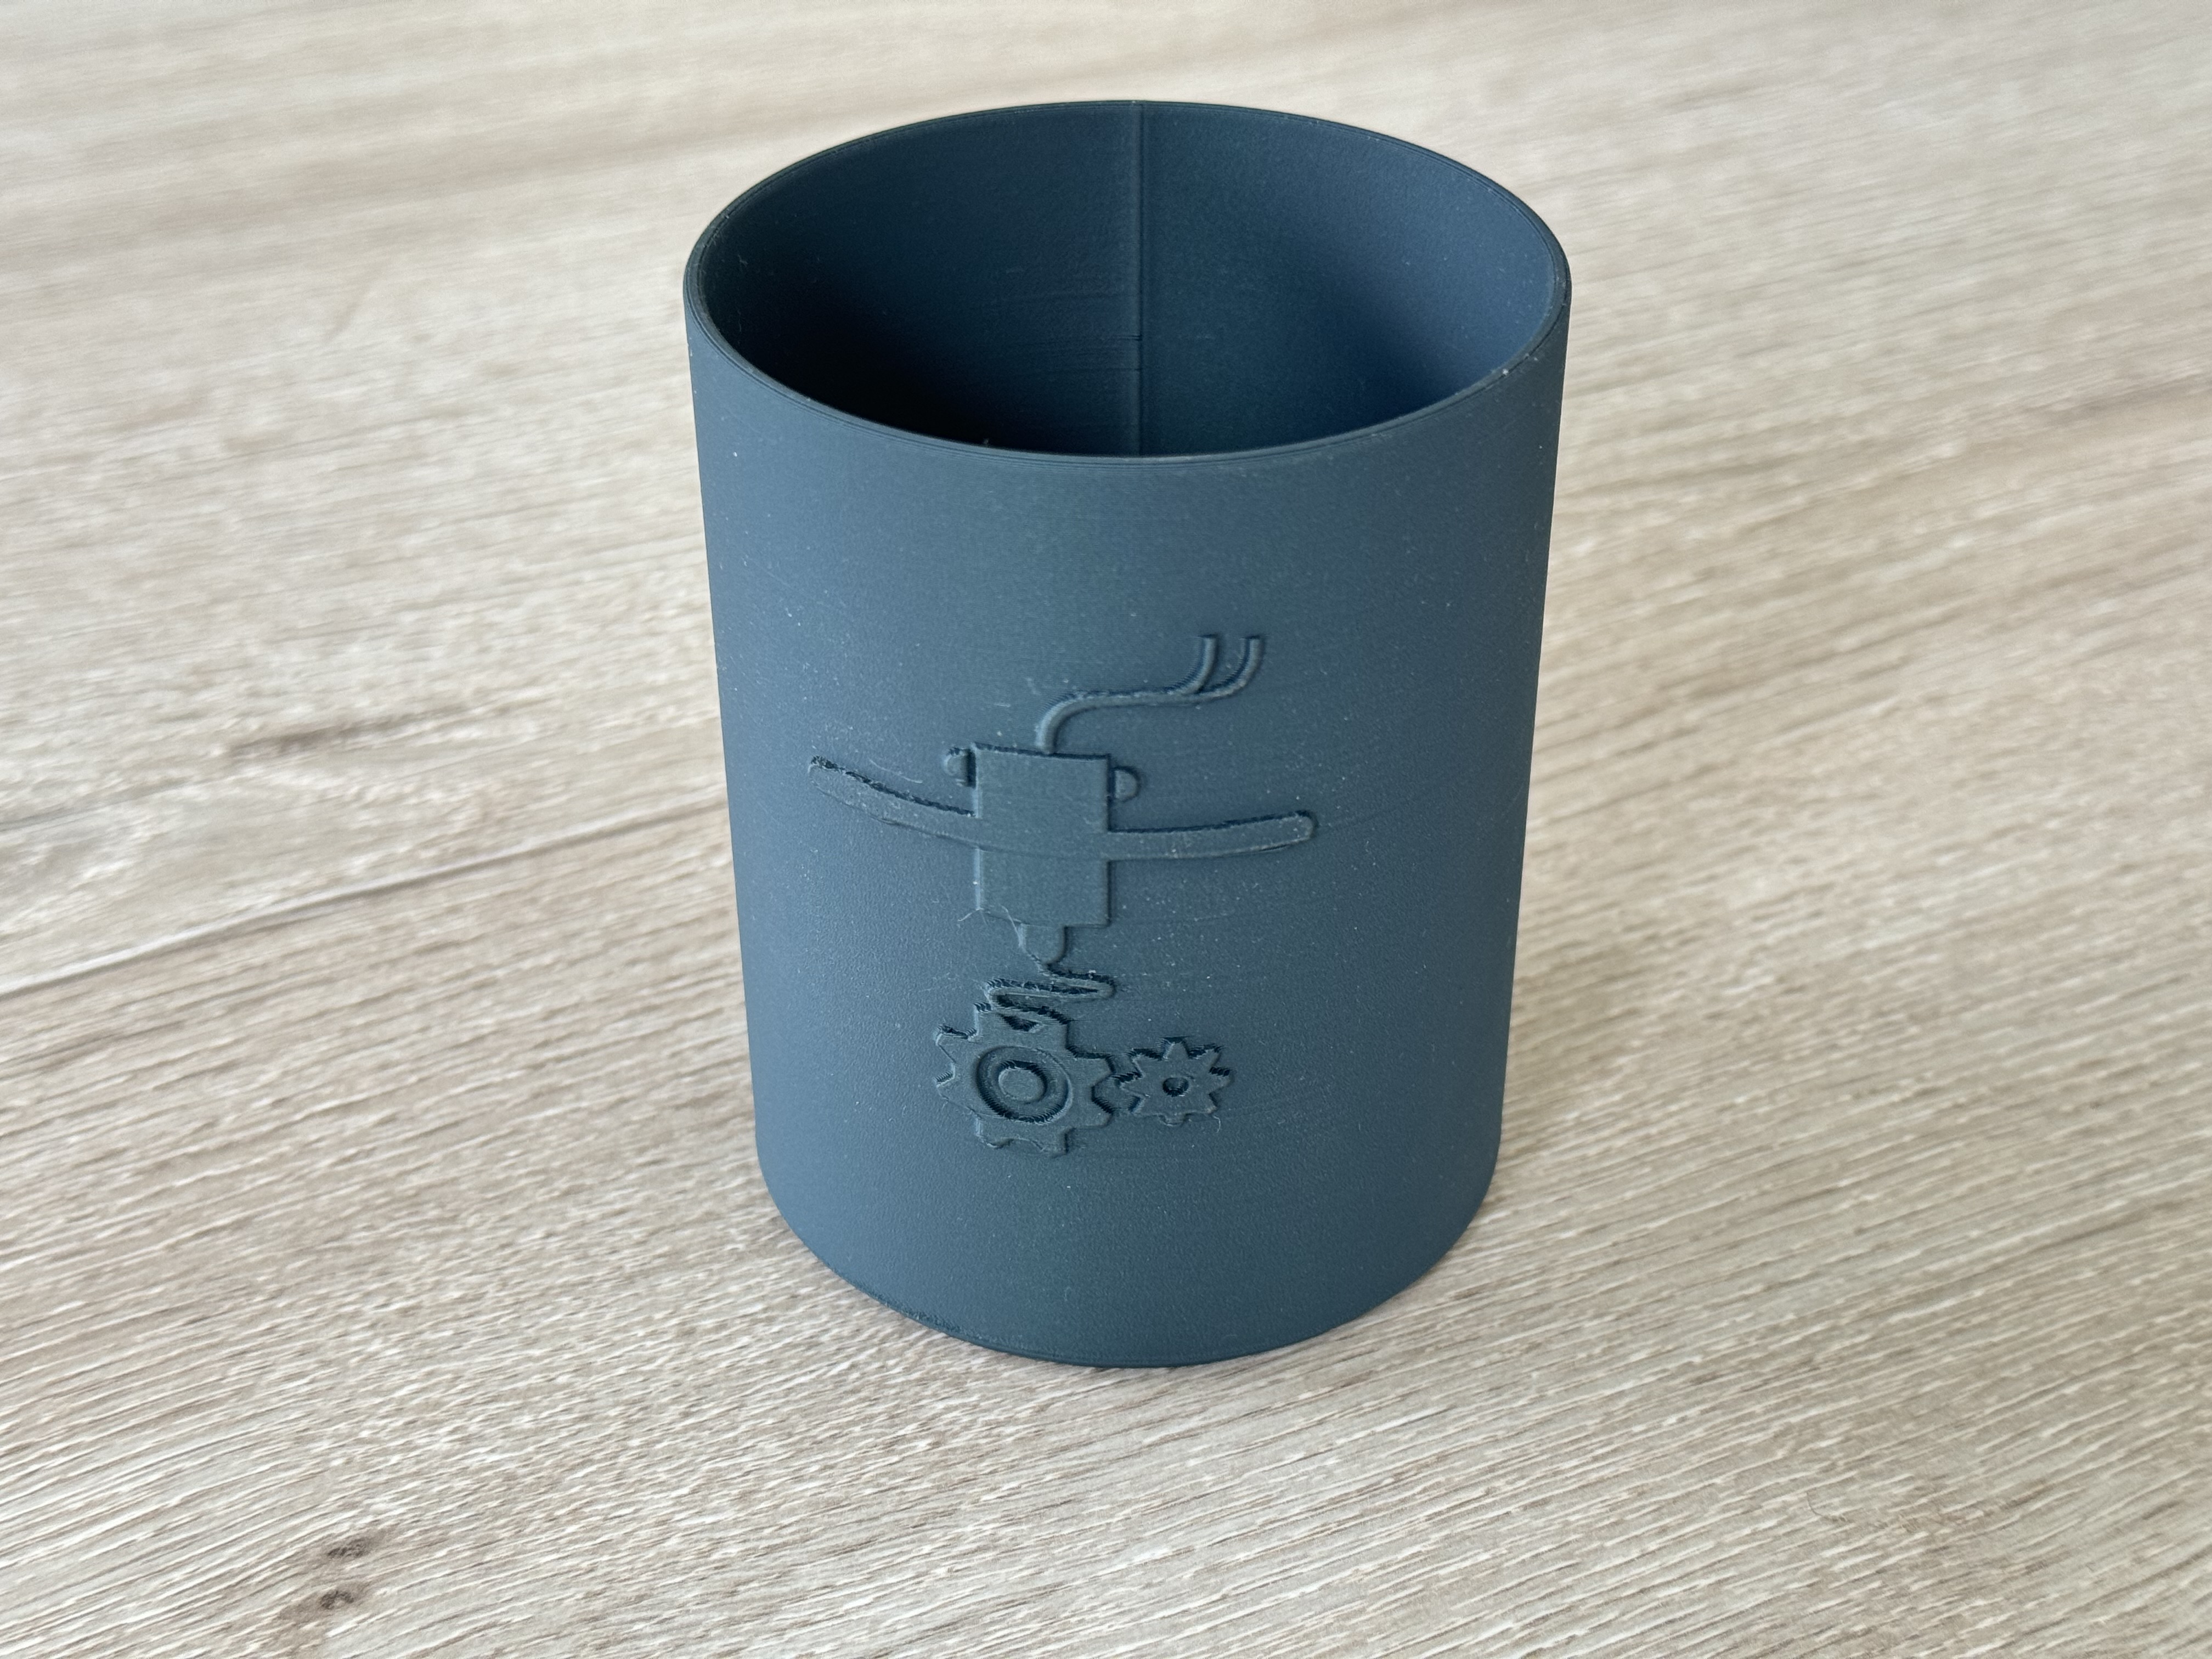
Another improves with our pencil pot, with an image.
In this new tutorial, we are going to do the same thing as in the previous one, but will replace the text with an image.
The image must be in SVG format.
Here is a site to convert images in SVG format: [https://convertio.co/fr/jpg-svg/oquer(https://convertio.co/fr/jpg-svg/)
Have taken up the old tutorial until the creation of the outbreak of the offbeat.
The SVG file appears in your sketch, the image can be huge as a very small one.
It’s up to you to position your image and give it the right size.
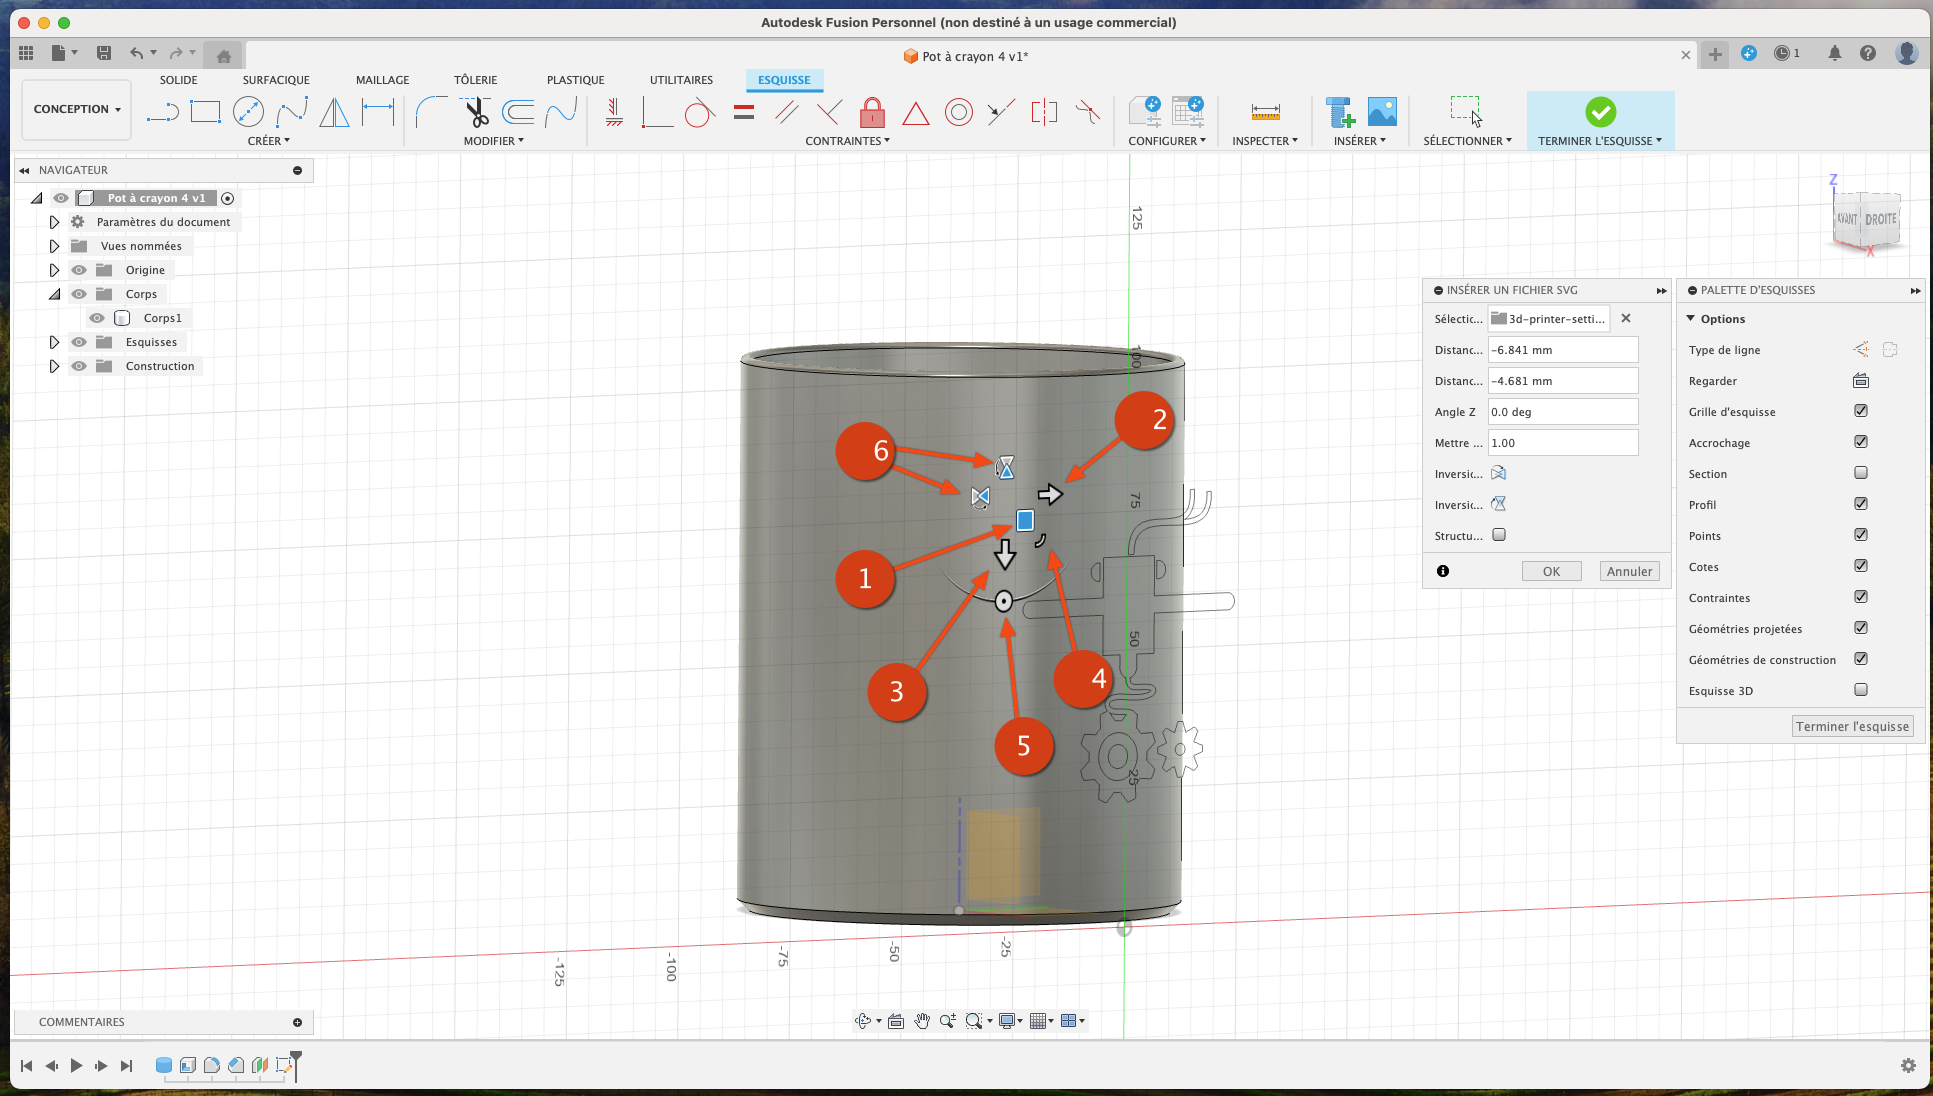
1 - To precisely move the image in all directions (top low, right left).
2 - To move the image horizontally.
3 - To move the image vertically.
4 - To change the size of the image.
5 - To rotate the image.
6 - To make an image mirror.
Once the image is well positioned and at the right size, validated by entrance.
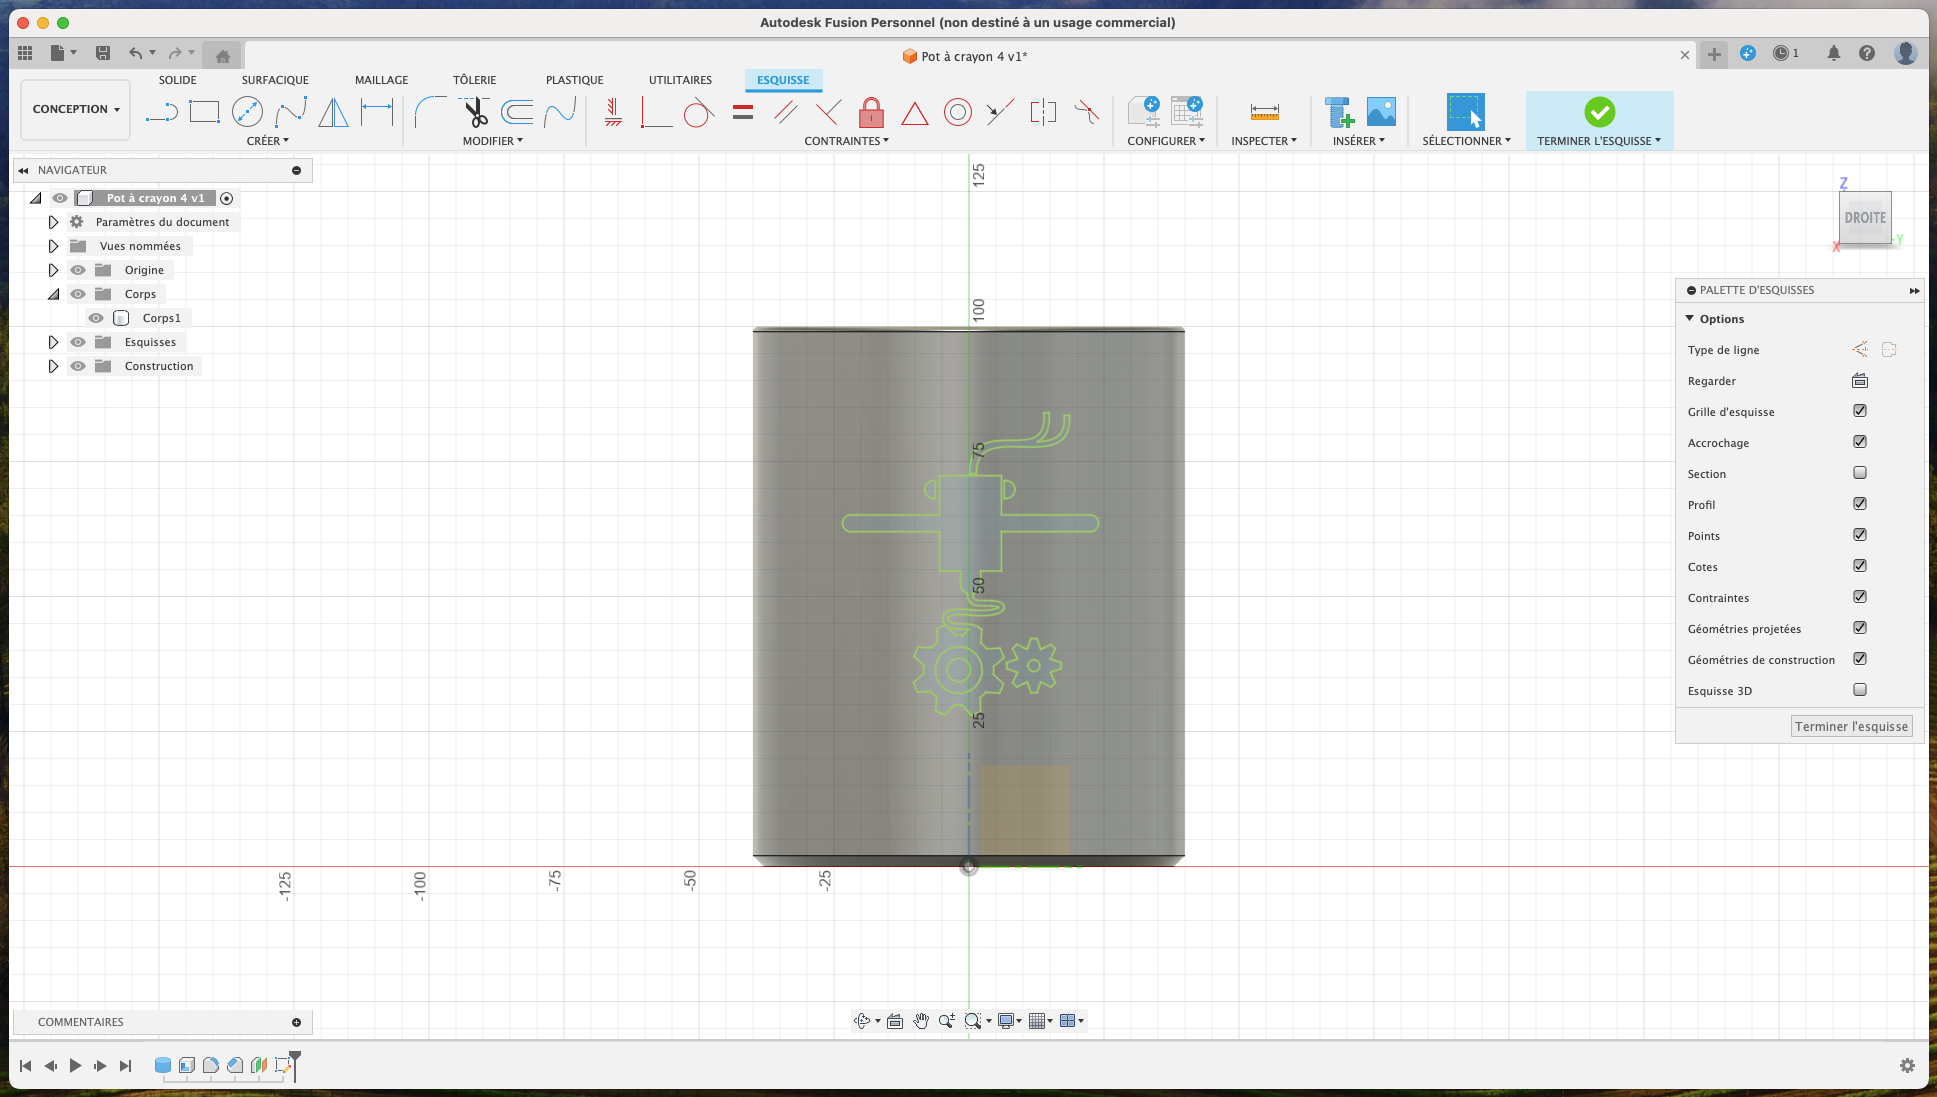
Leave the sketches.
As in the previous tutorial, go to Create then engraving in relief.

The engraving of the SVG image is on our pencil pot.
The Fusion 360 file: [https://makerworld.com/en/models/452421#Profileid-359648oquer(https://makerworld.com/en/models/452421#Profileid-359648)
Good modeling.